Installation
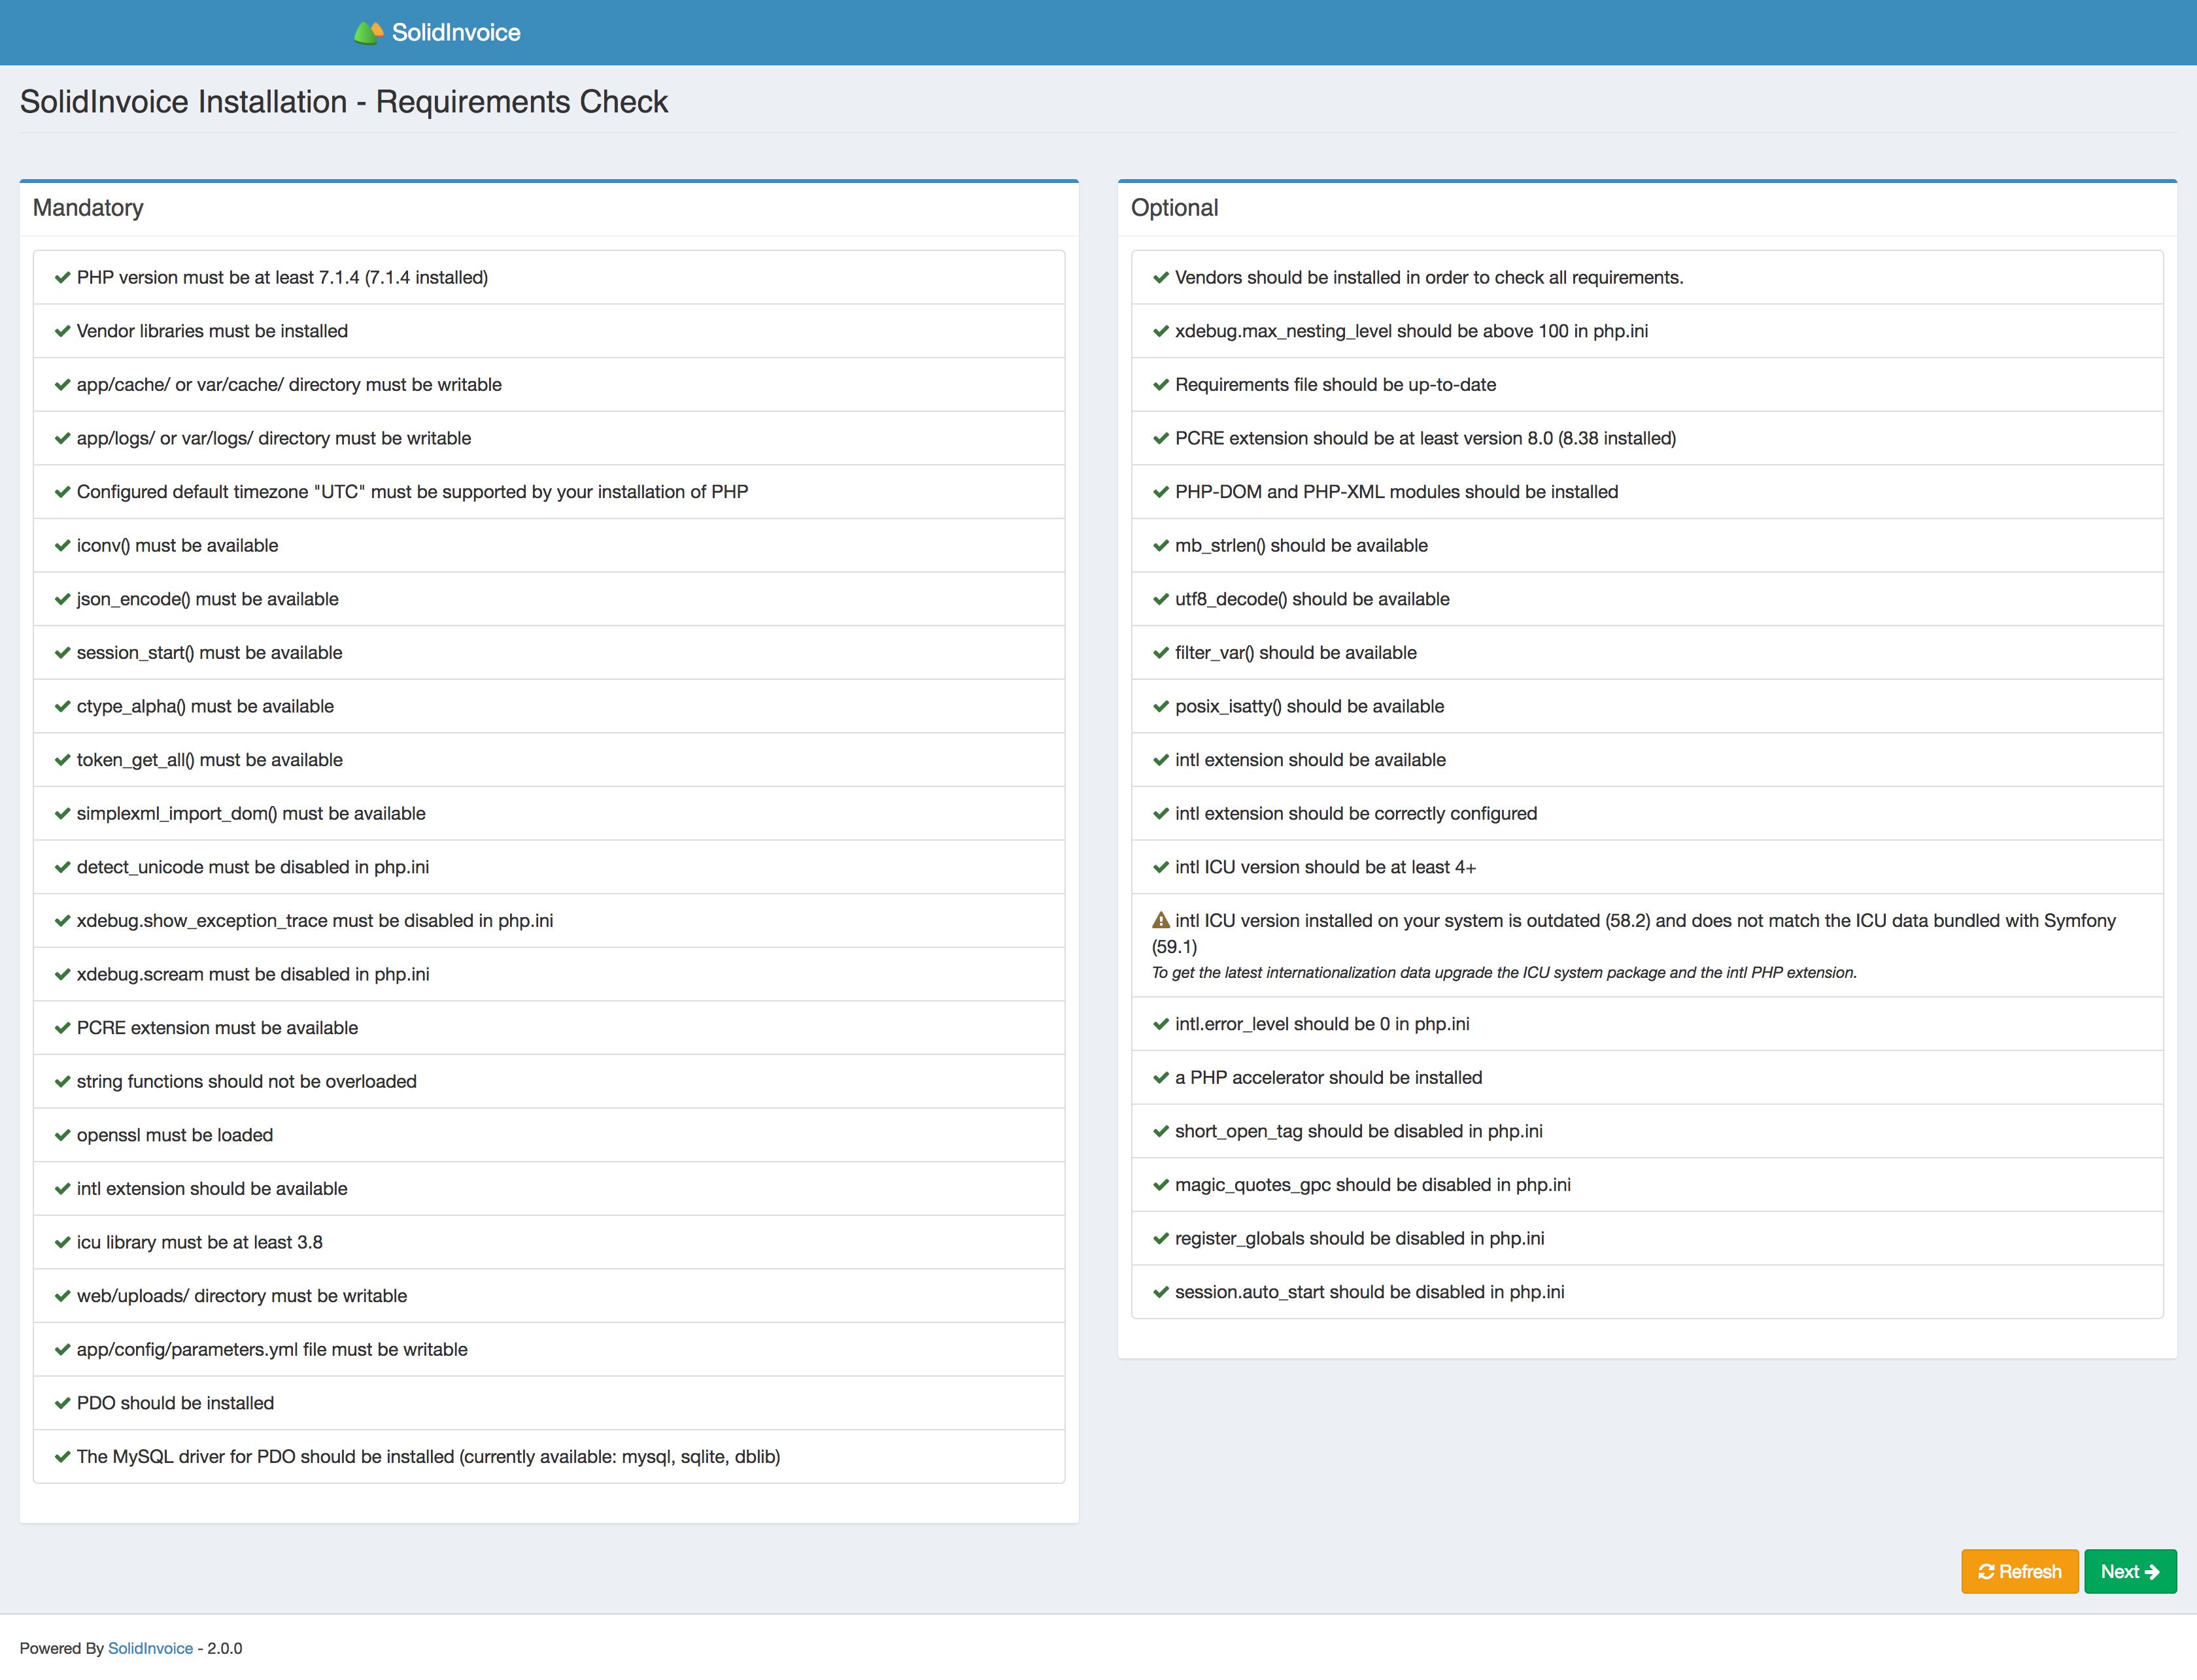
When navigating to the application for the first time, you will automatically land on the installation page.
This page will show if your system meets all the requirements in order to run SolidInvoice.
If your system does not meet the requirements, an error message will advise you what you need to change in order to meet the requirements.
After you have fixed any issues, refresh the page by either pressing F5 or hitting the Refresh button.
If there are no errors, you can proceed by pressing the Next button.
Configuration
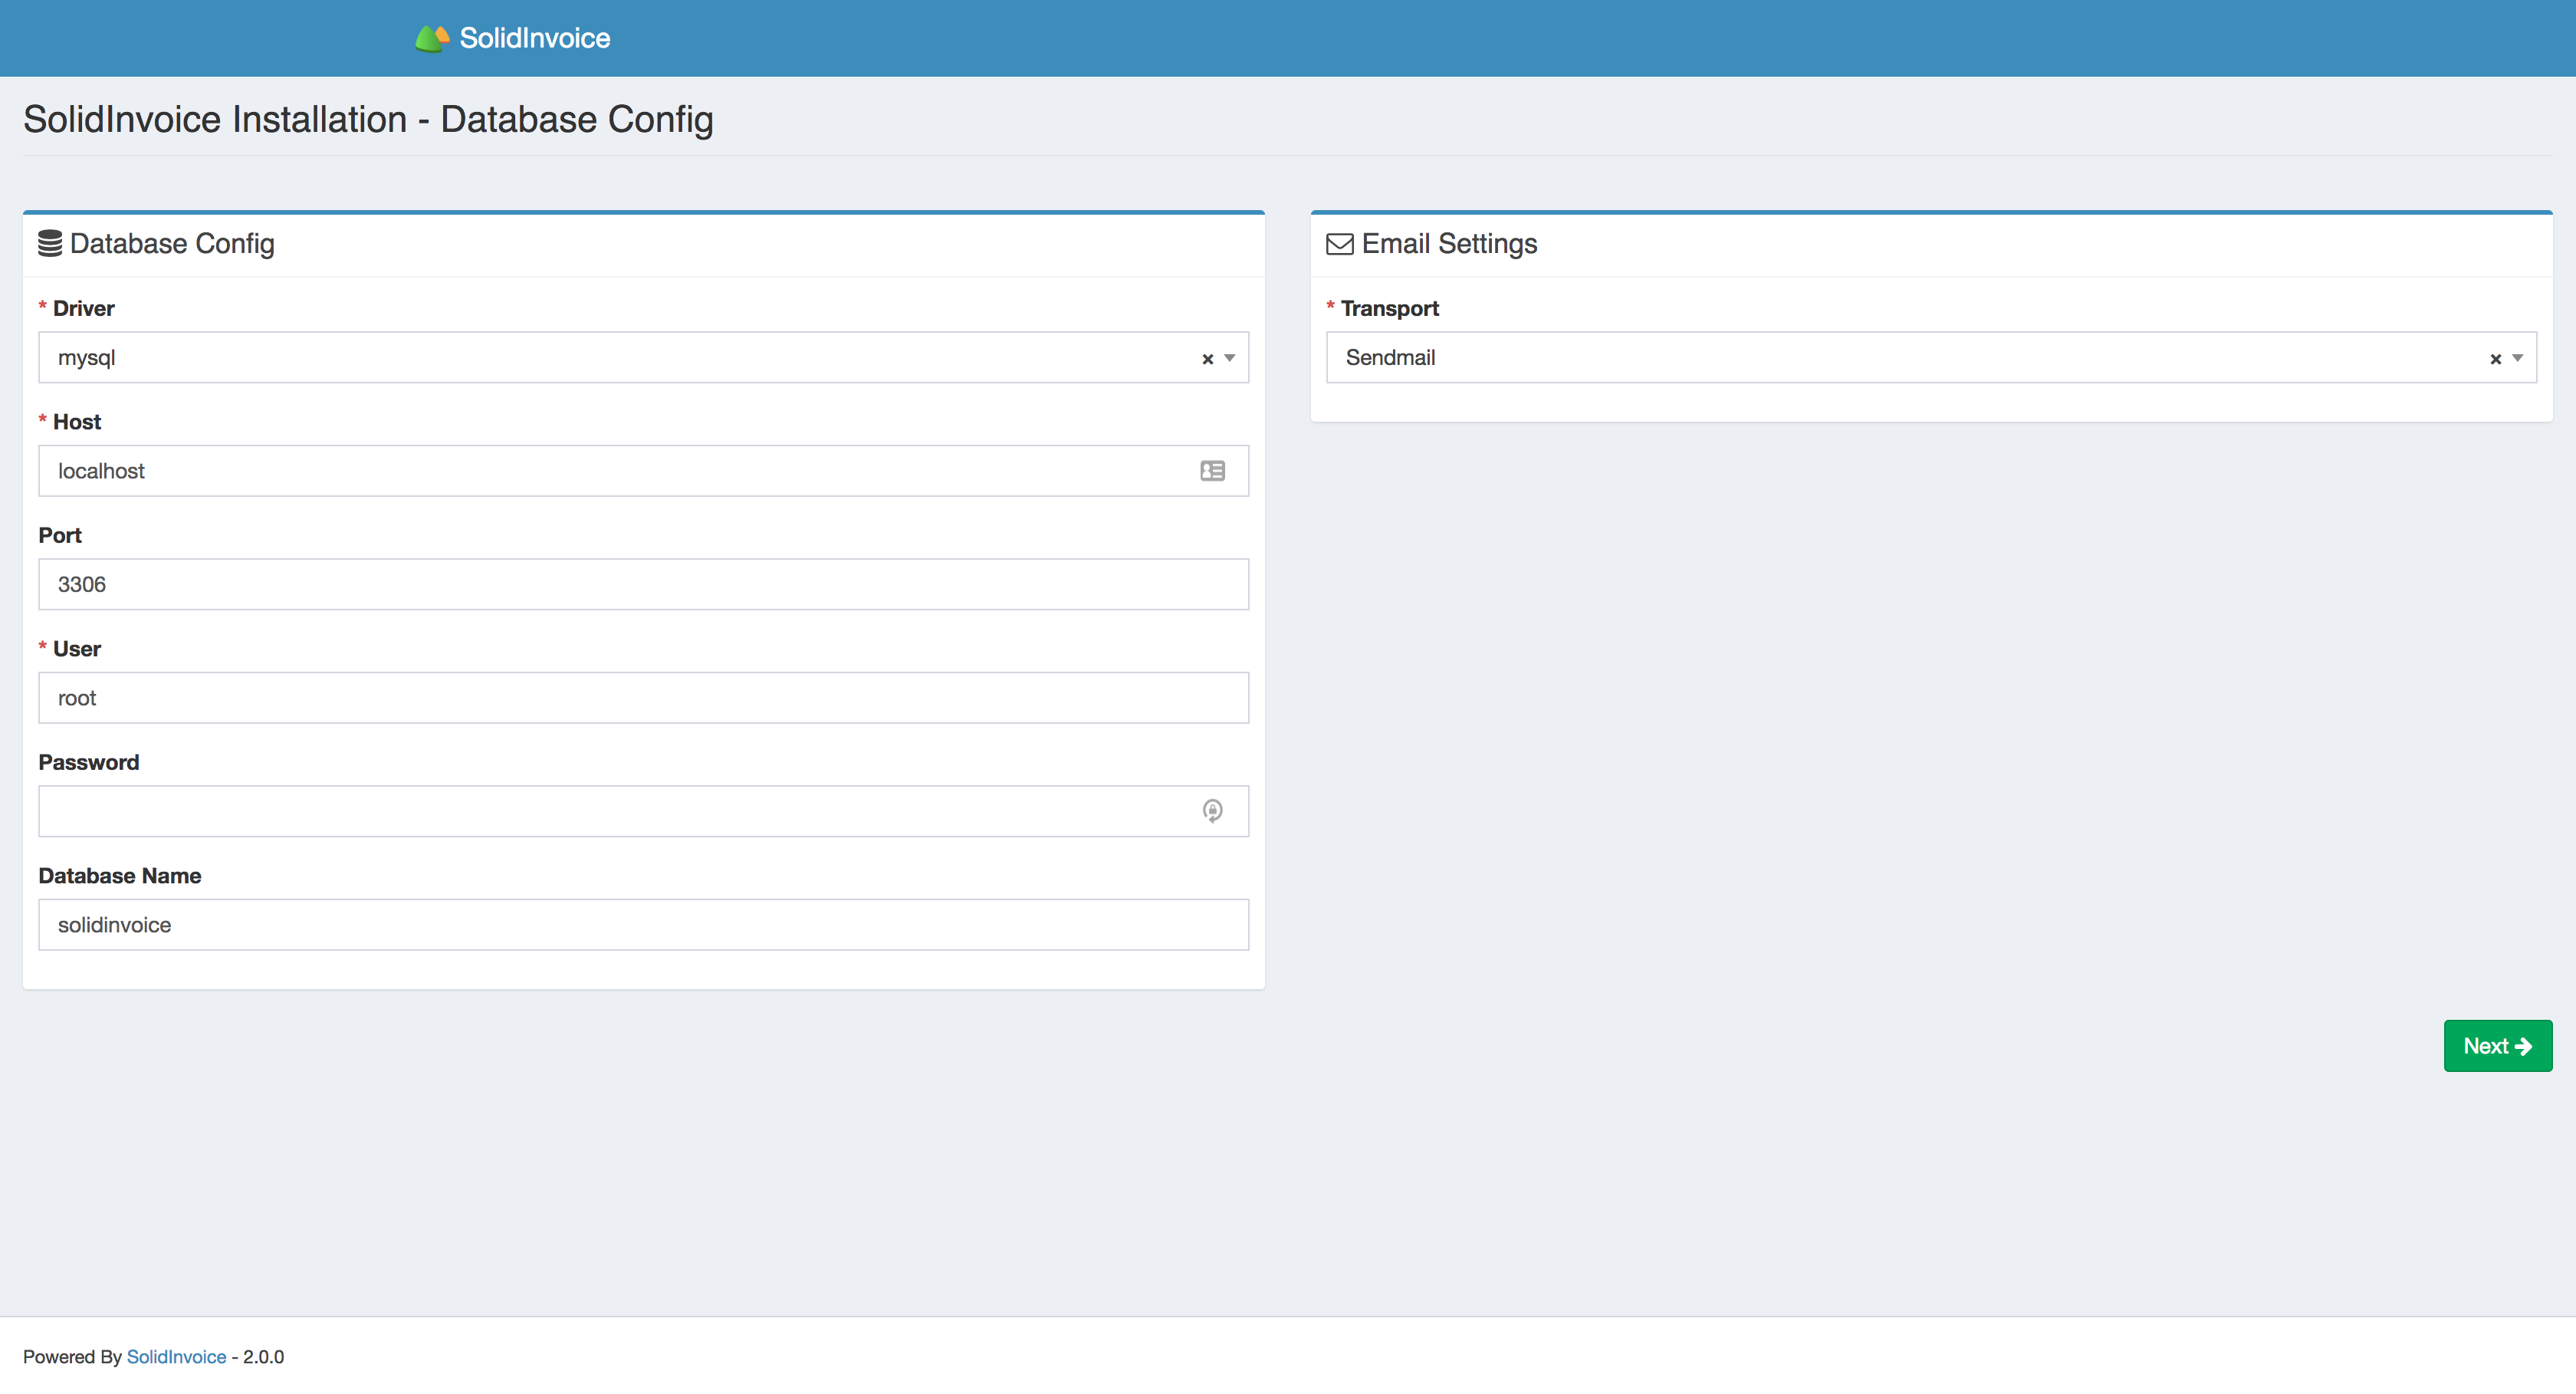
This step allows you to set up your database and email configuration.
Database Configuration
Add your database information. If the database doesn’t exist, SolidInvoice will attempt to create it.
Attention
Only MySQL is supported at the moment. Support for other databases may be added in a future release
Email Configuration
Set up your email configuration in order to send out emails.
Current supported email transports:
| PHP Mail: | Uses the standard Note Your server must be configured correctly for this to work. |
|---|---|
| Sendmail: | Uses Sendmail for sending emails. Note Sendmail must be set up and configured properly on server for this to work. |
| SMTP: | Connects to a SMTP server for sending emails. |
| Gmail: | Sends emails through Gmail. Note: A valid Gmail account and password must be provided. |
When you are done, continue by pressing the Next button.
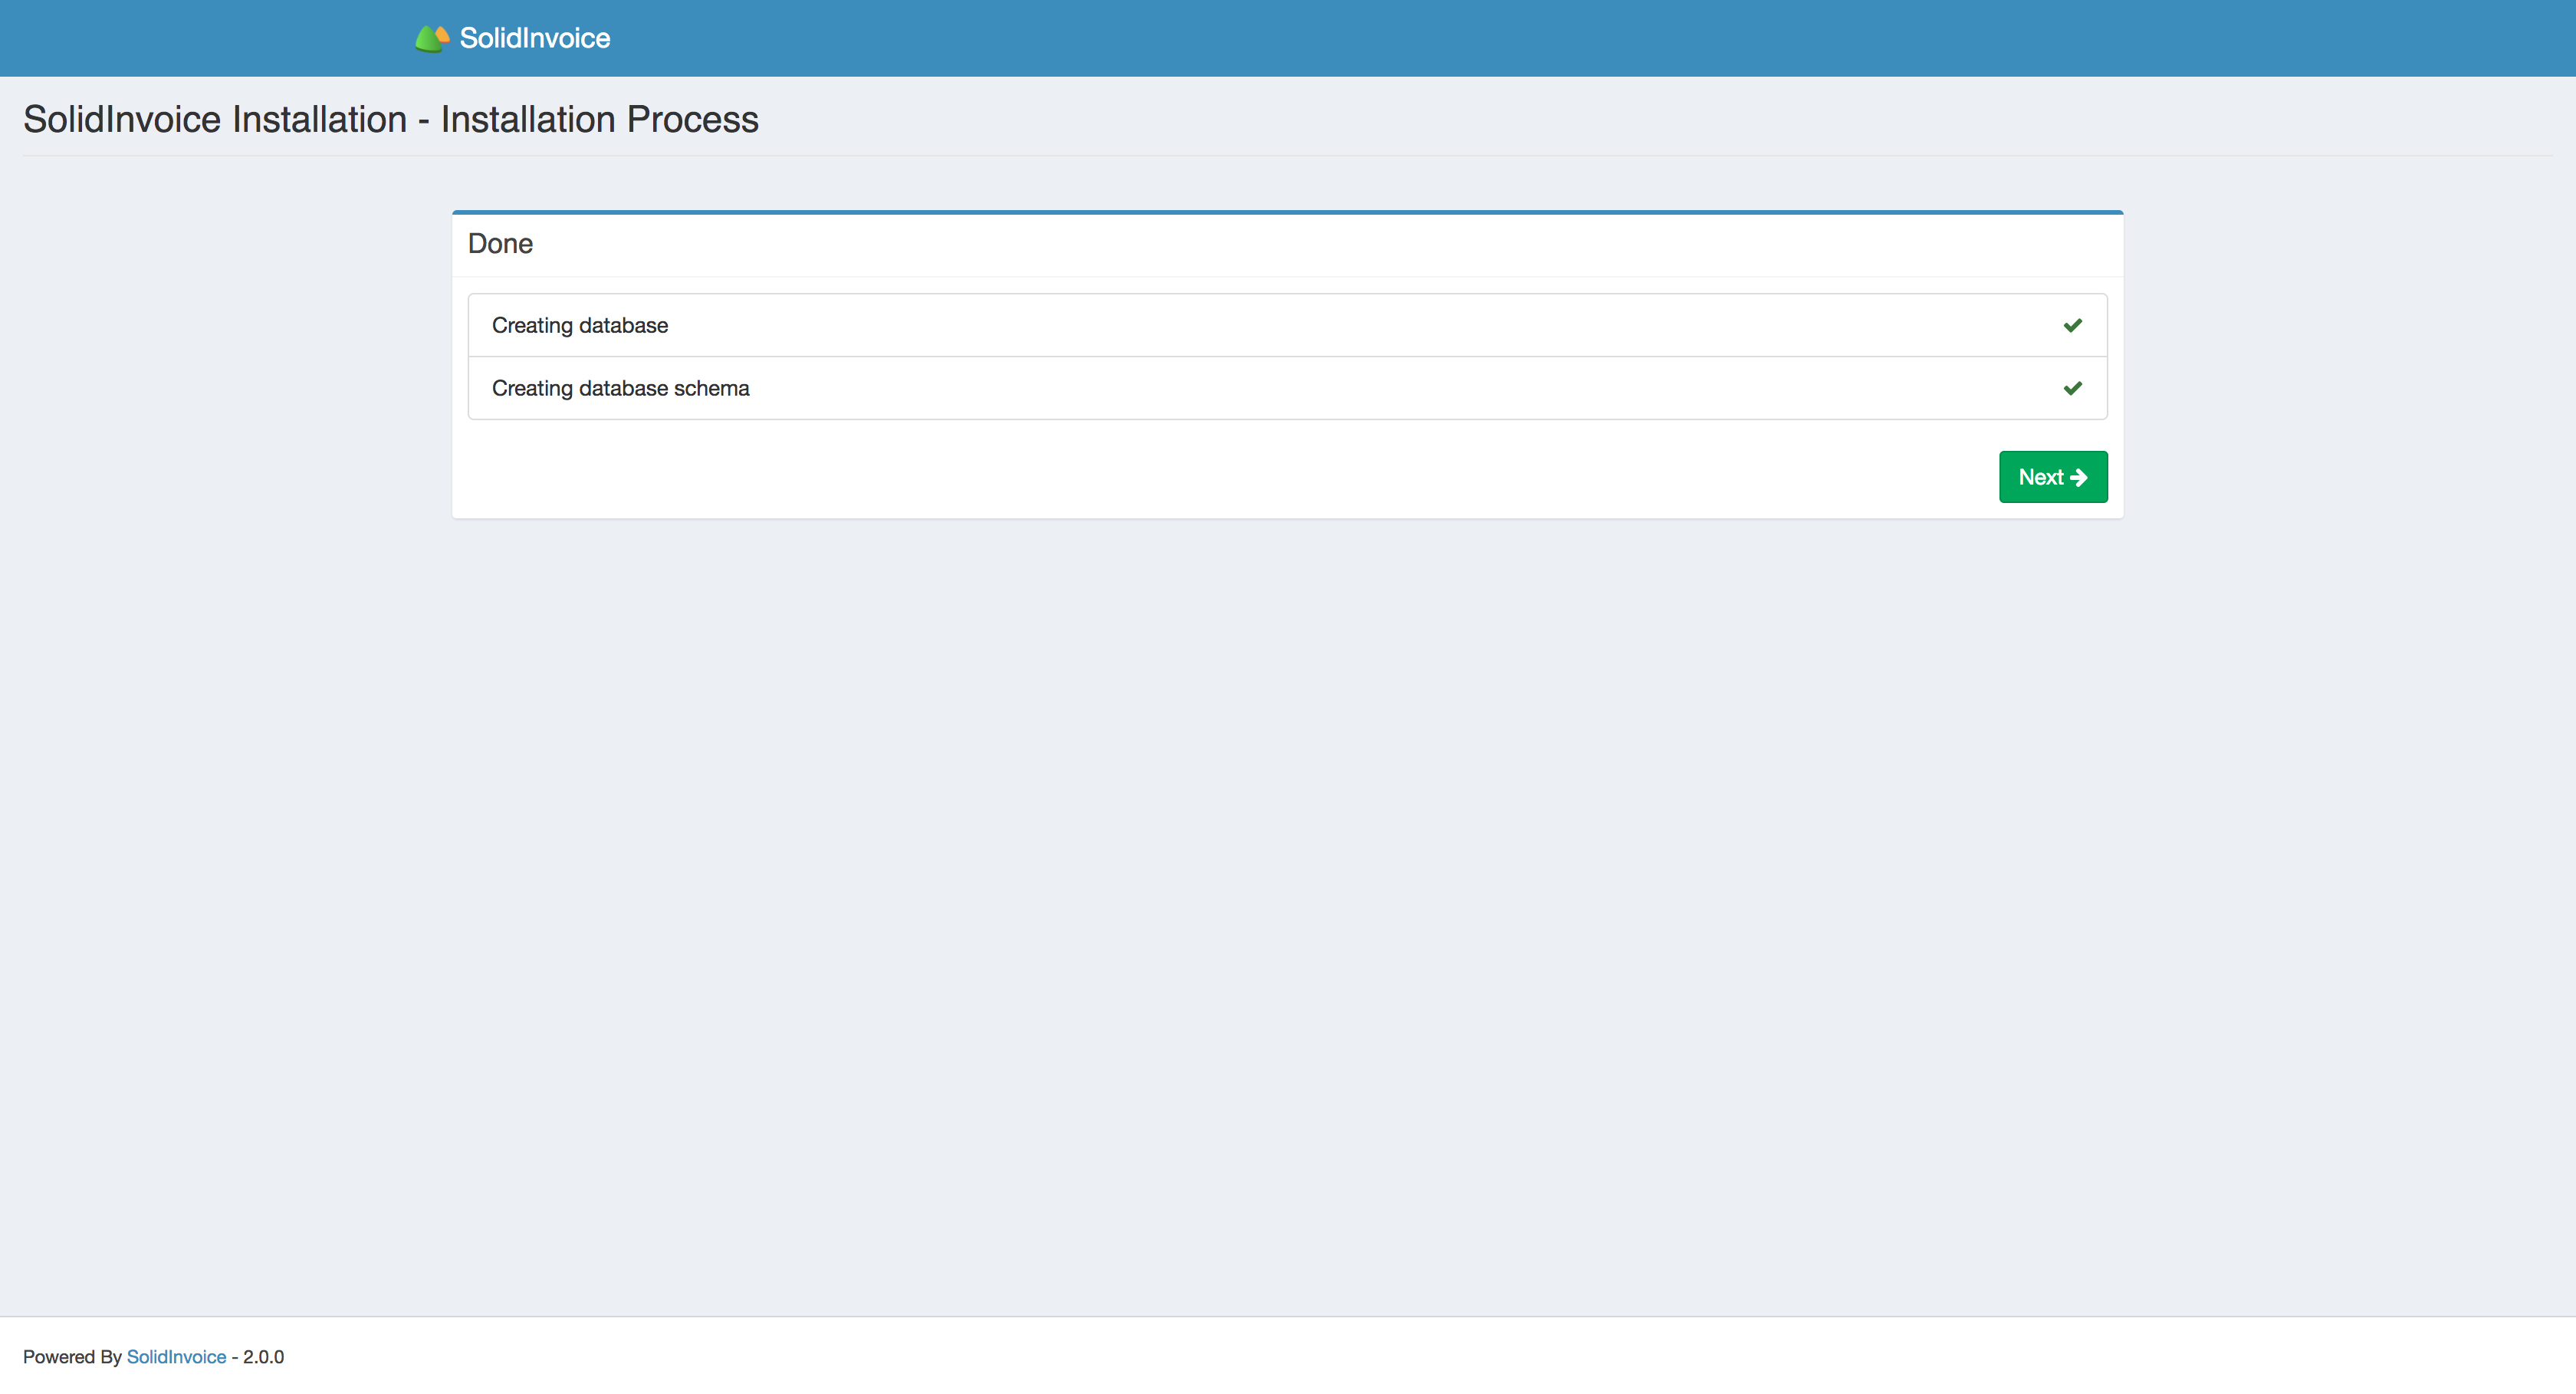
Installation Process
At this point, the database will be installed and all your tables will be created.
When the installation is complete and there are no error, you can continue with the setup process by pressing on the Next button.
System Information
The following values needs to be configured:
| Locale: | Note The Locale doesn’t only determine the language to use. It is also used for currency and number formatting. So be sure to choose the correct locale for your country. Note Only the |
|---|---|
| Currency: | |
| Base Url: | This value should be pre-populated, and in most cases can remain unchanged. |
When you are done, continue by pressing the Next button.
Admin User
You need to create an admin user. The provided details will be the credentials you use to log into the system.
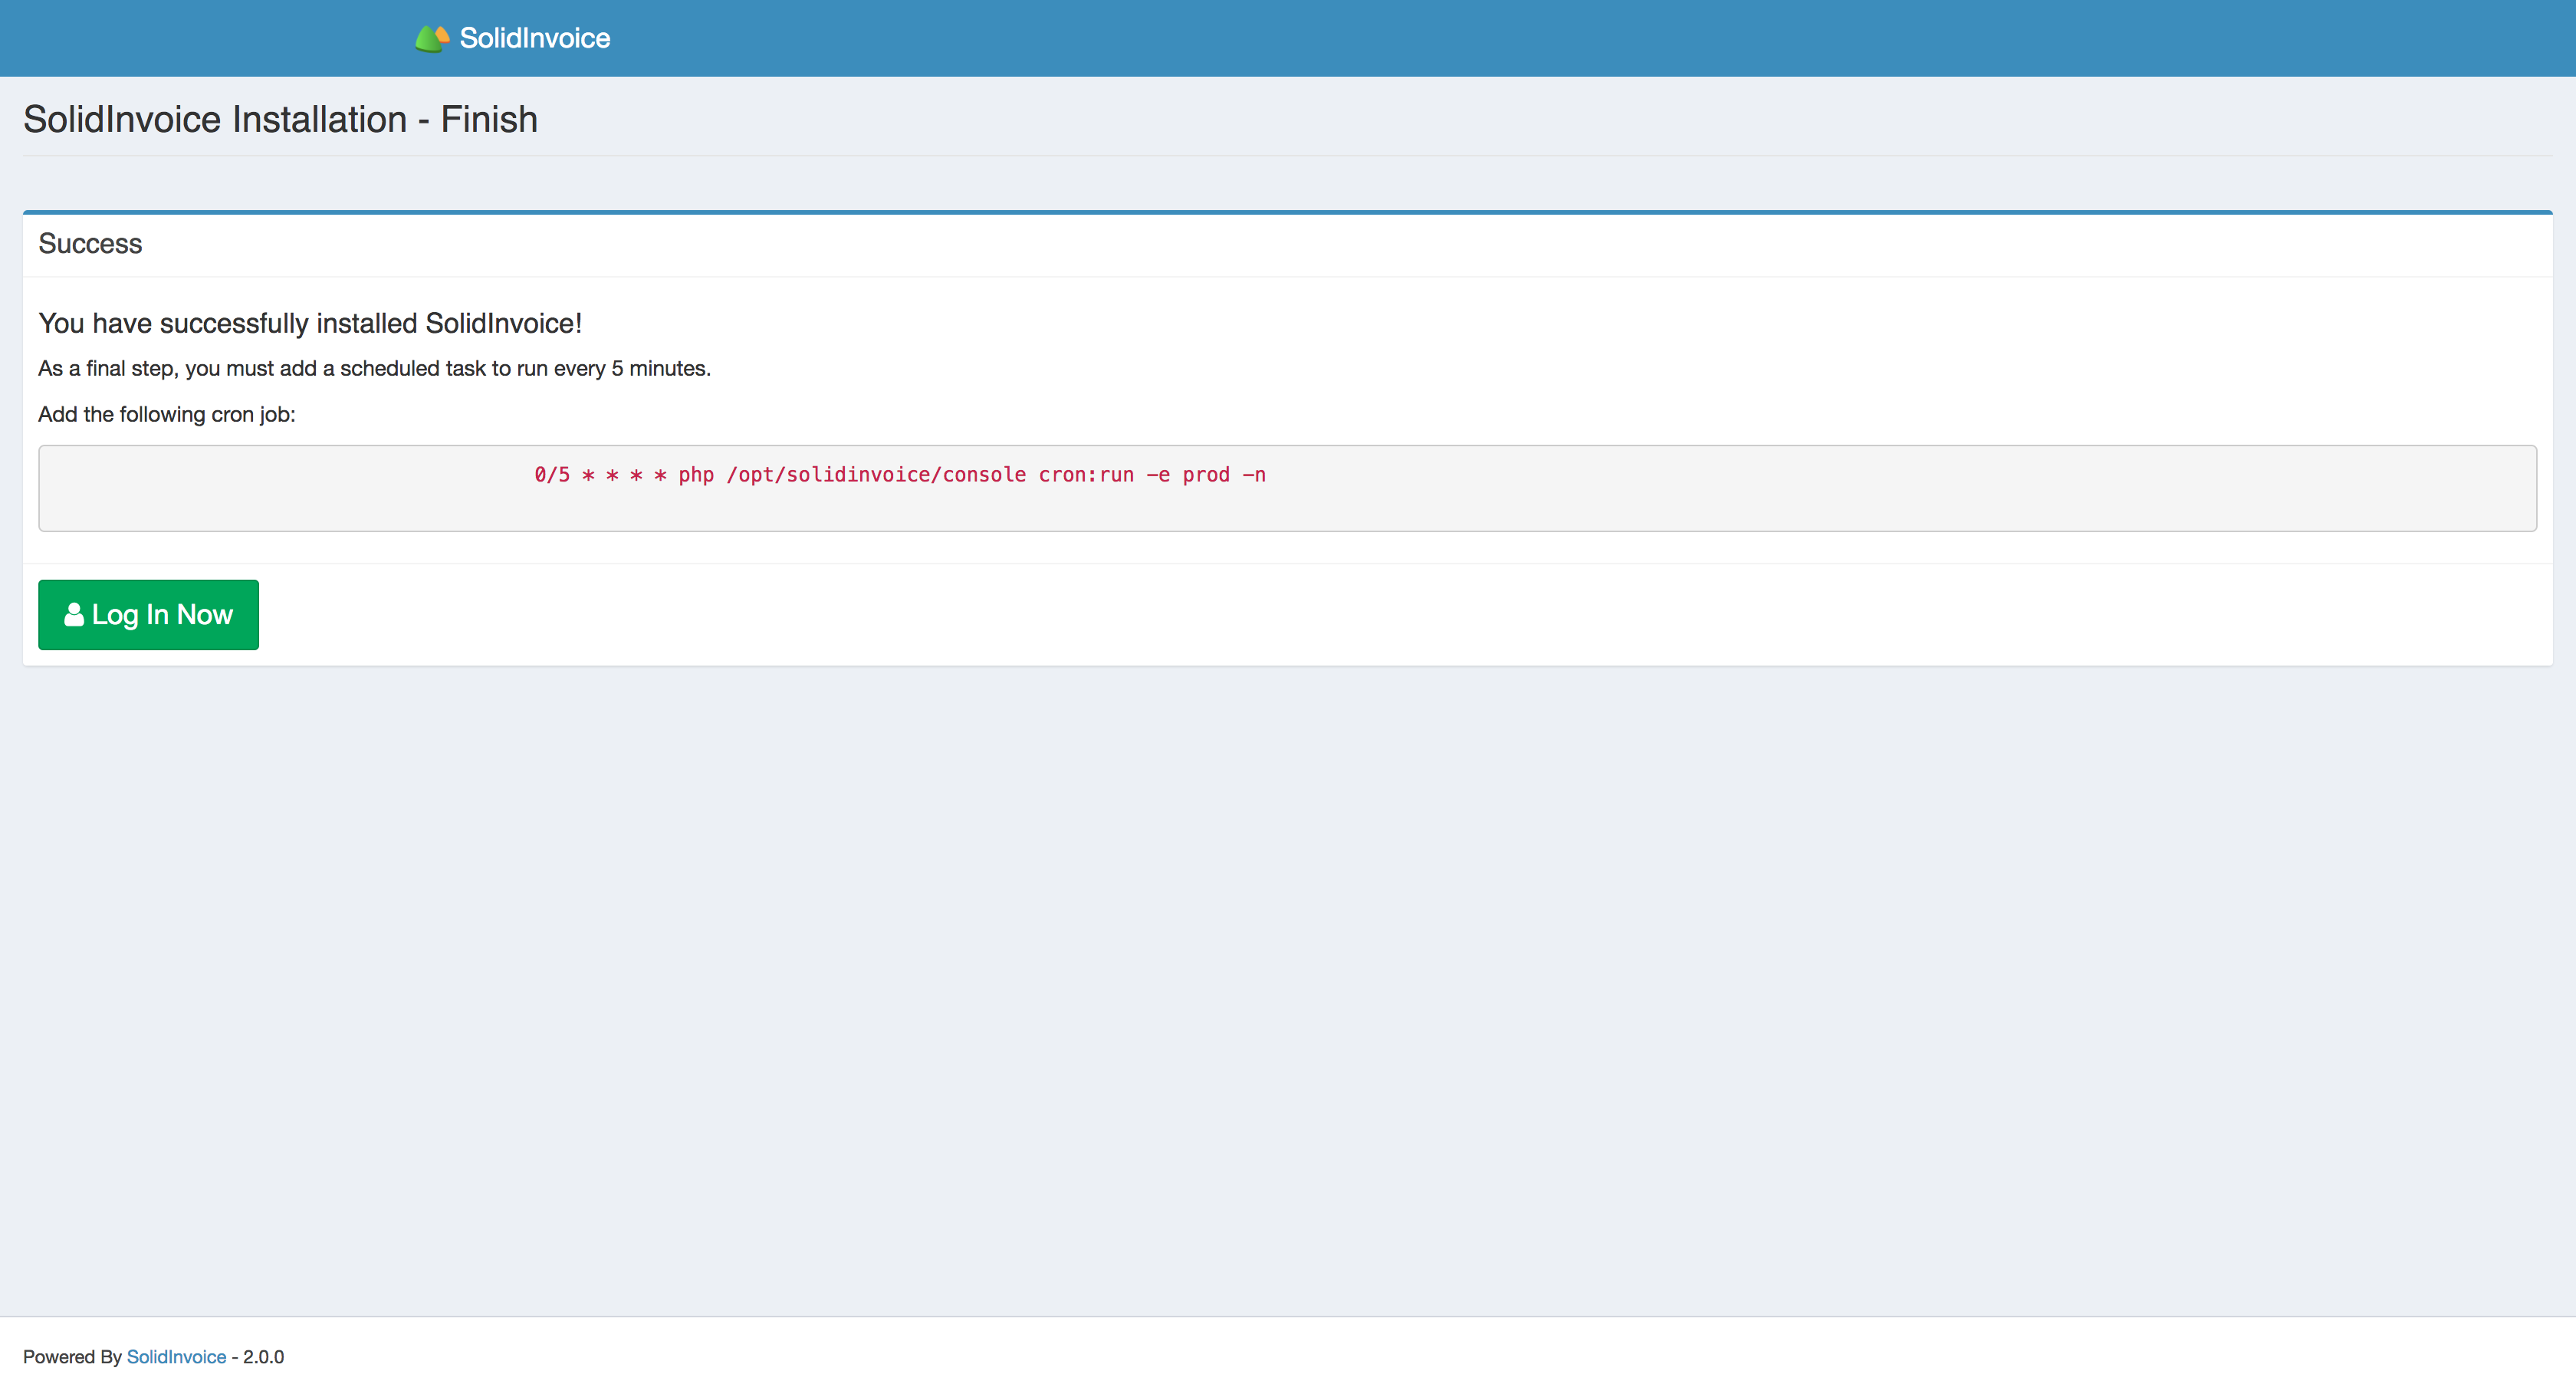
Final Steps
After the setup process is complete, the last step is to set up the Cron job.
The Cron job is used to run scheduled tasks like recurring invoices. Setting up the cron job will be different based on your hosting provider. Please consult your hosting provider for the proper way to set up the cron job.
Warning
If you do not set up the cron job, functionality will be limited, and scheduled tasks won’t be able to run. It is highly recommended to set up the cron job.
When you are done and ready to use the application, press the Log in now button to log into the application.